How to Grow Magic Mushrooms At Home: Your Easy, Step-By-Step Guide

How to Grow Magic Mushrooms At Home: Your Easy, Step-By-Step Guide

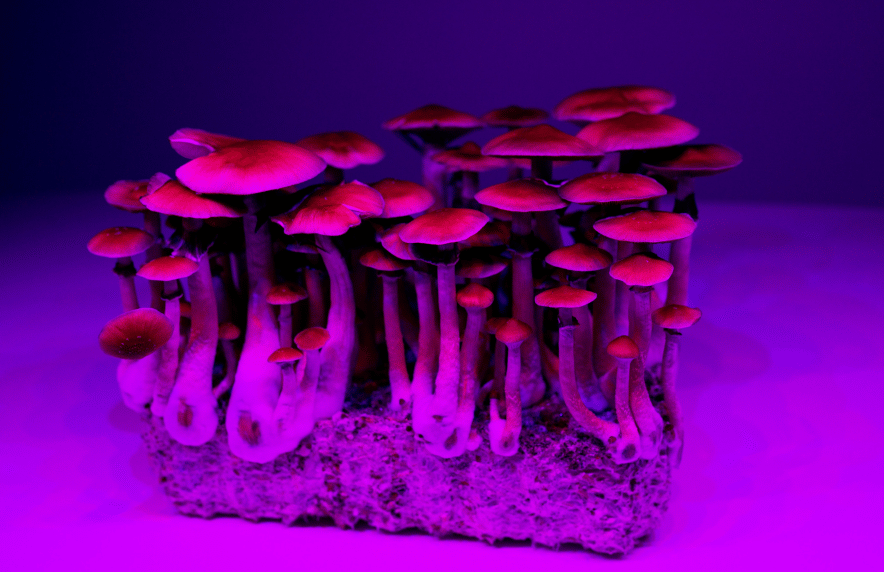
If you’re a beginner or seeking healing, wisdom, insight, or a deeper understanding of yourself and your life, we suggest diving into the enchanting world of Golden Teacher Magic Mushrooms. They’re DIY-friendly, renowned for their healing vibes, and might just become your lifelong fungal companion.

DISCLAIMER: Growing magic mushrooms is illegal in some areas and permitted in others. We encourage you to check the legal status of magic mushrooms in your area and do not undergo magic mushroom cultivation in areas where it is illegal. 

We believe in accessibility to alternative forms of medicines beyond pharmaceutical prescriptions and traditional psychological practices. Whether you prefer our expertly designed, read-made microdoses or to experiment with growing your own, we want to empower you on your healing and growth journey. 

In this article:

What to know before you grow: risks & challenges

Choosing your magic mushroom strain:


Step 1: Building your grow chamber 

Step 2: Inoculation and Colonization

Step 3: Preparing the grow chamber for fruiting

Step 4: Incubation

Step 5: Harvesting

Step 6: Mushroom Storage

Ever wondered how to grow magic mushrooms at home? You’ve come to the right place! Today, we’re dishing out the ultimate DIY guide to cultivating your own fantastical fungi.

Heads up: it’s a bit of a journey. But if you’re a committed DIYer, a plant-loving green-thumb-haver, or just a curious psychonaut, growing magic mushrooms can be a mindful and rewarding adventure. Plus, you’ll end up with a whole harvest of healing plant medicine right at your fingertips.

Rather leave the magic to the Mycologists? We’ve got you. Our targeted magic mushroom blends are cultivated in-house with an experienced Mycologist and have been honed and perfected with extensive research, testing, and sourcing of the highest quality, reliable ingredient sources.  

Every single batch is tested twice for contaminants – once through the growth cycle and again in the manufacturing cycle. In the growth cycle, we test for contaminants in our lab by isolating fungi material from each harvest, and in the manufacturing cycle, we test the products themselves with chemical assays. We use a spent coffee grind substrate for the most sustainable grow method possible. 

During production, we work in a sterile environment with PPE and our staff is highly monitored. We do not use latex gloves and store our products in an ideal dry and contaminant-free environment.

Peruse our range of sustainably grown Canadian Magic Mushrooms Capsules, Magic Mushroom Tea, and Magic Mushroom Chocolate

Whether you’re diving into DIY or opting for our ready-to-enjoy products, we’ve got you covered. Let’s get growing!

how to grow magic mushrooms at home

What to know before you grow: risks & challenges

1.   While legislation is slowly catching up to the science and demand, magic mushrooms are still illegal to grow in many areas. Keep this in mind before deciding to grow mushrooms of your own.

2.   Sterilization is key! Pay close attention to all the sterilization tips throughout this guide – one little contaminant or unsterile surface can be the difference between a magical kingdom of magic mushrooms and a tub full of mold.

3.   Capping can be challenging and slow, and pulverized psilocybin can create a lot of dust. Be mindful of psilocybin dust around animals and kids. 

4.   Create separate and identifiable storage solutions for capped psilocybin so that it isn’t mixed in with regular supplements. 

5.  Getting consistent dosage can be difficult with DIY; a microdose can easily become a macrodose if not measured correctly and with potency in mind.

6.    Some strains require an expert to be grown – keep this in mind when choosing your strain. 

how to grow mushrooms at home

Choosing your magic mushroom strain

While there are hundreds of magic mushroom species out there, they’re not all created equally. Some are very complicated to grow, while others are primed for DIY. Some strains unleash vivid hallucinations, others induce intense physical sensations, some make you feel one with the universe, and still others spark powerful spiritual experiences and intuitive insights.

But here’s the twist: everyone’s trip is as unique as their fingerprint. Magic mushrooms have an innate intelligence and will give every individual the experience they need at that time – so two trips on the same strain can feel worlds apart, and experiences between strains can vary widely. Every strain also has countless health benefits including improved mood, energy, focus, sleep, and emotional processing.

Golden Teacher Magic Mushrooms

If you’re a beginner or are seeking healing, wisdom, insight, or a deeper understanding of yourself and your life, we suggest Golden Teacher Magic Mushrooms. Known for producing thought-provoking and uplifting spiritual experiences, Golden Teachers are the most used strain for healing ceremonies and mental health conditions like anxiety, depression, and PTSD. They’re one of the easiest strains to grow, and have a medium to high potency. 

We use Golden Teacher Mushrooms in all of our Magic Mushroom Chocolate and Microdose Capsules including our bestselling Lite Brite Microdose Capsules which are made with high-quality golden teacher magic mushrooms, ashwagandha, passionflower, and CBD to help boost mood, calm anxiety, and increase energy. 

True Albino Teacher Magic Mushrooms

True Albino Teacher mushrooms are a more potent version of the original Golden Teacher mushrooms. They deliver a longer-lasting and more physically stimulating psychedelic trip. Experience True Albino Teacher mushrooms in our Prism Social Spice Tea.

 B+ Magic Mushrooms

B+ magic mushrooms are a popular strain for beginners. With a medium potency, users experience a mellower, more relaxing trip with warm euphoric energy, pleasant visuals, and deepened spiritual connection. This strain is best grown in cooler climates. We use B+ mushrooms in our Prism Social Spice Tea.

Penis Envy Magic Mushrooms

Dubbed for their distinctive shape, Penis Envy mushrooms are one of the most potent strains out there. With a very high psilocybin content, they create an intense, sensory-rich hallucinogenic experience. Only seasoned psychonauts and growers should apply—these shrooms are very difficult to cultivate and are best left to expert growers. 

benefits of lite brite microdose capsules

Psychedelic Mushroom Glossary:

Before you grow, a couple terms of help you speak mushroom-ese more fluently:

Spores: the reproductive organs of a mushroom that contain all the genetic information needed for mushrooms to grow and reproduce. 

Mycelium: a network of thin white fungal threads (hyphae). Mushrooms as know them are the fruiting bodies of the larger mycelium network.

Substrate: the medium the mycelium grows in and feeds on. 

Inoculation: the process of introducing a fungus to the environment it will grow in – in this case it’s done by injecting spores into the substrate. 

Colonization: this is when the mycelium begins to take over the substrate that was inoculated with mushroom spores. 

Incubation: the time in which mycelium grows to become mushrooms. 

Fruiting chamber: the container in which mycelium grows to produce mushrooms.

Casing layer: a layer of moist material that is placed on top of a colonized substrate before fruiting. 

Pinning: when tiny mushroom ‘pins’ start to pop up during the growth process.

The Grow Method: Monotub

There are countless magic mushroom cultivation methods out there, but today we’re focusing on the monotub method – a simple method with high success rates.  

A monotub is a plastic bin that, with this guide, you’ll transform into a self-contained magic mushroom growing chamber. Keep reading for your step-by-step in-depth guide.

Step 1: Building Your Monotub Grow Chamber

Supplies:

1.   A 64-quart clear plastic tub (Sterilite is a popular choice)

2.   Six 2-inch stick-on round filter patches

3.   Power drill with a small bit and a 2-inch hole saw bit

4.   X-Acto knife

5.   Measuring tape

6.   Marker

Directions:

1.   Measure and mark out six 2-inch holes around the perimeter of the tub about 8.5 inches from the base – two holes on each long side and one hole on each end.

2.   Use the small bit to drill small holes in the center of each marked circle. Next, create the larger holes with the 2-inch hole saw bit. Drill in reverse to minimize cracking and press very gently.

3.   Use the x-acto knife to clean up any plastic debris along the edges of the hole.

4.   Stick your 2-inch filter patches to the outside of the holes.

Step 2: Inoculation and Colonization

Your first step of mushroom growth – remember, sterilization is key to produce mushrooms instead of mold!

Supplies:

1.   A liquid culture syringe or spore syringe

2.   A sterilized medium like a grain bag

3.   70% isopropyl alcohol (works best in a spray bottle)

4.   Plastic gloves

Directions

1.  Wearing gloves, sanitize your work surface, your hands, and the outside of your grain bag or other sterile substrate with 70% isopropyl alcohol.

2.  Inject the spore syringe into your grain bag and store it in a dark area to colonize. Keep the room’s temperature between 24-27°C.

3.  After about 2-3 weeks, you should see white, fluffy mycelium spreading out from the inoculation point. Squeeze and squish the bag to break things up and speed up colonization.

4.  After about 4-5 weeks, you should have a bag of fully colonized grain spawn and you’re ready to start the fruiting phase in your monotub.

Step 3: Preparing the grow chamber for fruiting

Supplies:

1.   A sterilized substrate specific to the type of mushrooms you want to grow. Magic mushrooms like grain, sawdust, small wood chips, or coffee grounds. 

2.   70% isopropyl alcohol

3.   Plastic gloves

4.   Your already assembled monotub from step 1

Directions

1.   Sanitize everything with 70% isopropyl alcohol – the surface, your hands, and the inside and outside of your monotub. Do this is in a small, clean area with minimal airflow.  

2.   Break up your spawn bag by squishing and massaging it thoroughly – be careful not to create any holes in the bag.

3.   Pour half of your sterile substrate into the tub – you’ll need about 10 lbs of substrate total for this size of tub. 

4.   Layer your colonized spawn over the first half of your substrate and cover with the other half of your substrate.

5.   Mix it all together with your sterilized hands, breaking up any chunks and gently pack it down. The surface should be flat when you’re finished.

6.   Put the lid on the monotub, and voila, you have your very own fruiting chamber!

Step 4: Incubation

Store your tub away from direct sunlight in a temperature controlled room between 70-80°F (about 21-27°C). Growing mushrooms is a delicate process: a too-hot room will dry out your mycelium and promote contamination, and a too-cold room will slow down or completely stop the colonization process.

Supplies:

1.   Coco coir

2.   Boiling water

Directions

1.   After about 2-3 weeks, your substrate should be fully colonized with mycelium.

2.   Now, add a thin casing layer to the top of the substrate: this could be peat moss or coco coir. You’ll need to rehydrate coco coir before putting it in your monotub. How to: Put coco coir in a large bowl and pour 2L of boiling water directly overtop and mix well with a fork. Next, allow the coco coir to sit for a few hours to reach room temperature before placing in your monotub.

3.   Place a 1-inch layer of the coco coir over the surface of the mycelium.

4.   After a few weeks, you should see some tiny mushroom ‘pins’ popping up. 

Step 5: Harvesting

1.  The mushrooms are ready to harvest when the caps are fully open but still slightly domed – just before the veil underneath the cap breaks. Harvesting at this stage ensures higher potency and a longer shelf life.

2.  Gently twist and pull out the mushroom clusters and then cut them apart at the base of the stem.

how to grow magic mushrooms at home

Step 6: Mushroom storage

Drying out your mushrooms is key to maintain potency, extend their shelf life, and prevent mold.

How to:

1.   Initial drying: lay your mushrooms on clean paper in a well-ventilated area away from sunlight for 24-48 hours. Use a fan to help dry them out quicker.

2.   Dehydration: use a food dehydrator and set the temperature between 95-105°F (35-40°C) to remove moisture while maintaining the mushrooms’ psychoactive compounds.

3.   Your mushrooms are dried out when they snap or crack instead of bend.

4.   Store in an airtight container in a cool place away from direct sunlight. Keep in the fridge or freezer for longer-term storage.

5.   Dried out mushrooms can be used to make mushroom tea or mushroom capsules. 

Thanks for tuning in to our magic mushroom growing guide! 

Rather skip the DIY and leave the magic to us? Shop our selection of  sustainably grown Magic Mushrooms Capsules, Magic Mushroom Tea, and Magic Mushroom Chocolate.